
Edit & export a video
Trim your recording, add zooms and a background, then export the finished file.
On this page
Every recording opens in the same editor. Trim what you do not need, add zooms where the viewer should look, choose a background, then export one finished video. Your original recording is never changed.
Open the editor
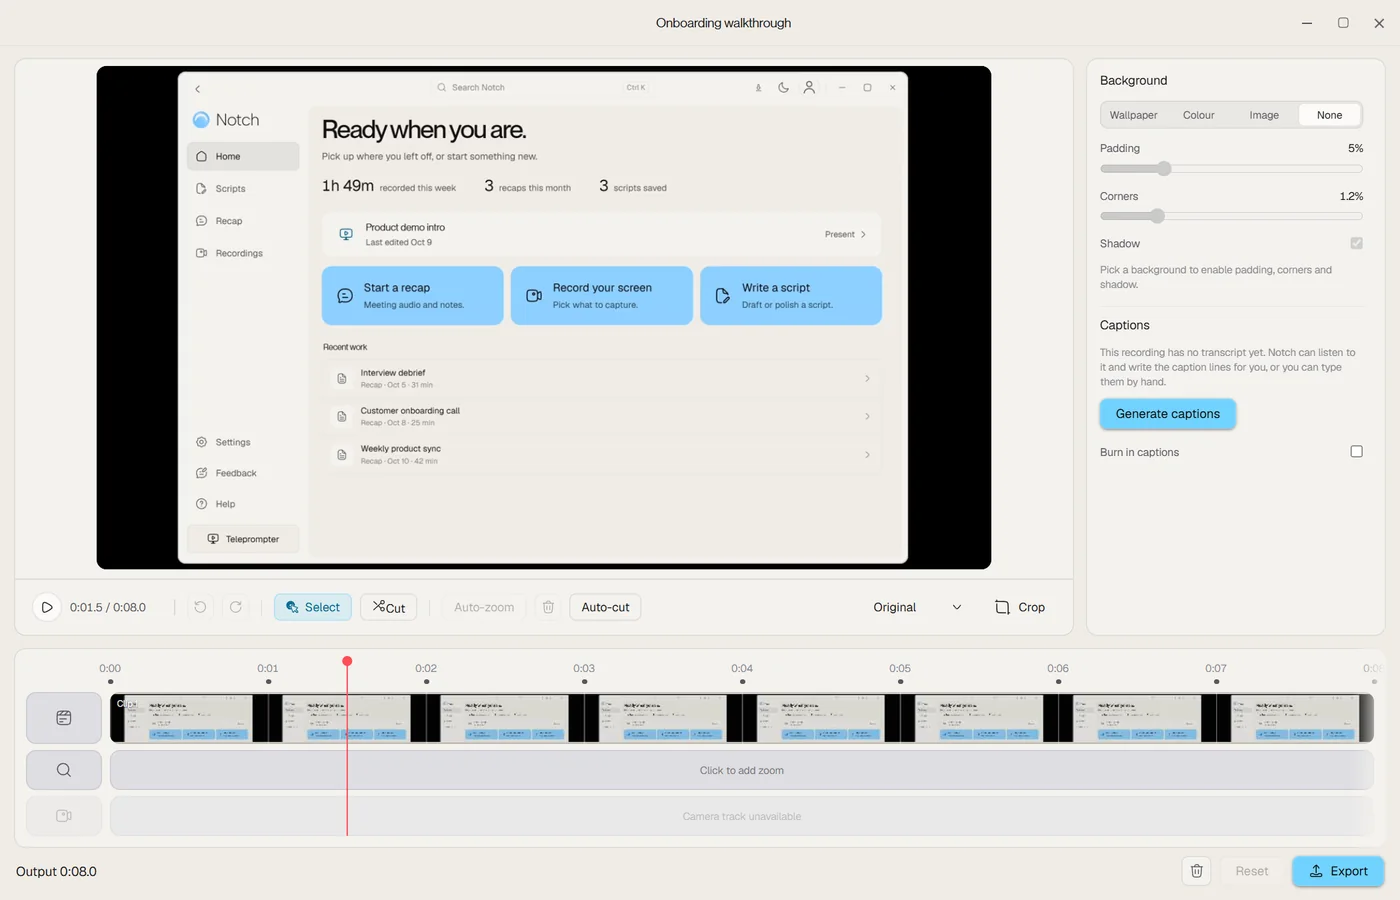
- In Notch, open Recordings in the sidebar.
- Use the search box, Date filter or Sort menu to find the video. Each card shows its length.
- Click the recording to open it in the editor. Use the … menu on a card for other actions, such as renaming or deleting.
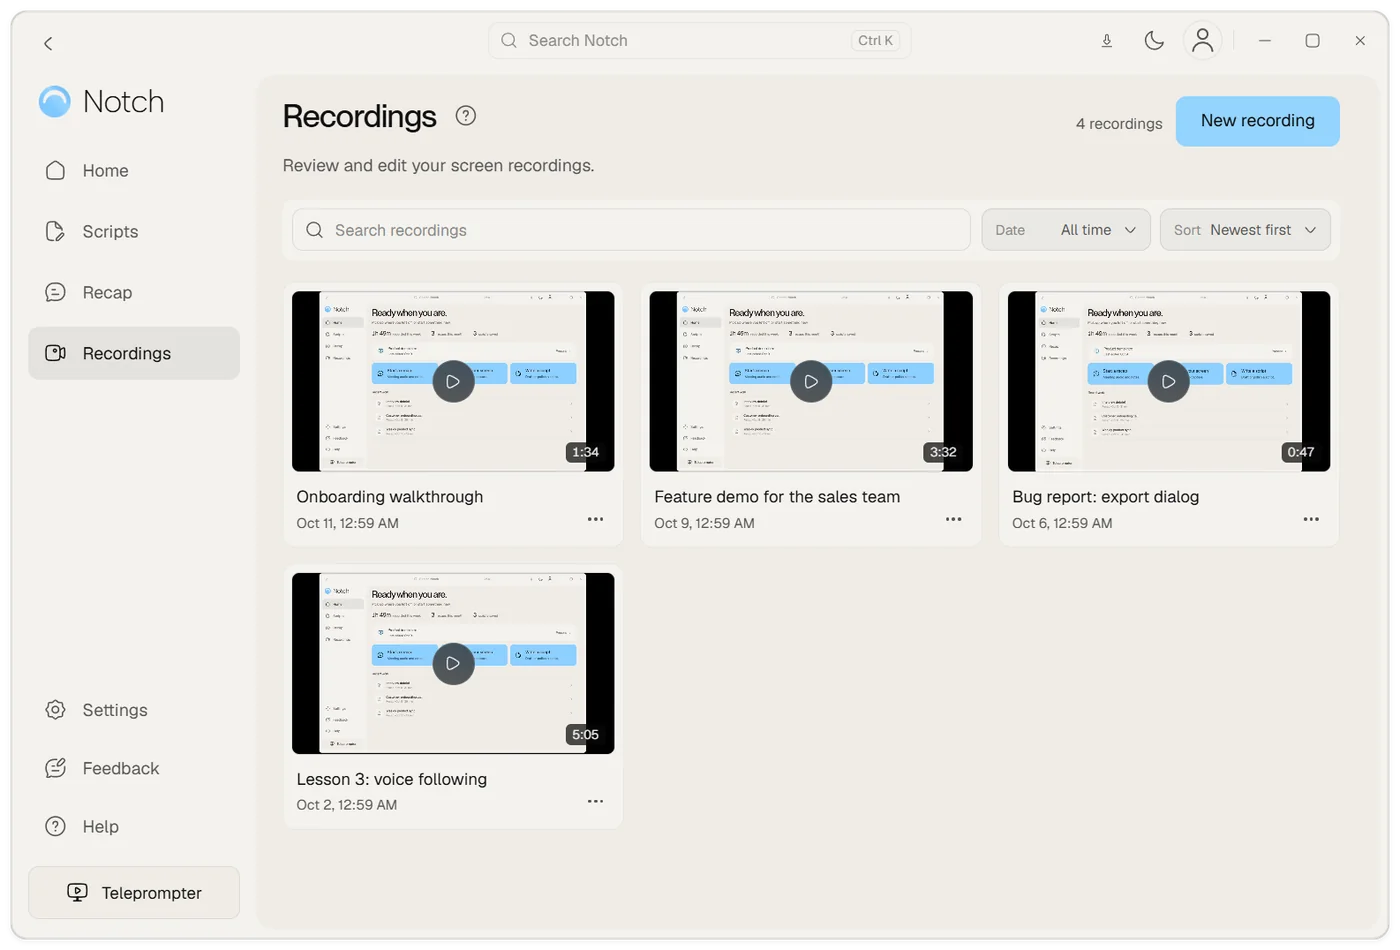
A quick tour of the editor
| Area | What it does |
|---|---|
| Preview (top left) | Shows the finished look, including background, zooms and captions. |
| Toolbar under the preview | Play, Undo and Redo, Select, Cut, Auto-zoom, Clear zooms, the Aspect ratio menu (starts at Original) and Crop. |
| Right panel | Background (Wallpaper, Colour, Image or None), Padding, Corners, Shadow and Captions. |
| Timeline (bottom) | One track for your clip, one for zooms and one for camera-only moments, with a red playhead. |
| Bottom bar | Output length after your cuts, Delete recording (the bin icon), Reset and Export. |
Trim and cut
- Choose Cut, then click the video where you want to split it. Or place the playhead and press Ctrl+B (Cmd+B on Mac).
- Choose Select, click the part you do not want on the clip track and press Delete or Backspace. The Output length at the bottom left updates.
- To trim the start or end, drag the handles at the ends of the clip inward.
Removed sections close up automatically, so the finished video plays without gaps. Press Space to play or pause. ← and → move one frame at a time; hold Shift to jump one second.
Add zooms
Zooms move the picture in so viewers can read a detail, then return to the full view.
- Auto-zoom adds zooms for you from where your cursor moved and clicked. It is unavailable when a recording has no cursor data. Review the zooms and delete any you do not want.
- To add one by hand, click the zoom track where it says Click to add zoom, or press Z at the playhead.
- Select a zoom to adjust it, and press Delete to remove it. Clear zooms removes them all.
Change the look
- In Background, choose Wallpaper and pick a preset, Colour for a solid or gradient, Image for your own picture, or None.
- Use Padding, Corners and Shadow to frame the recording. Padding is the space around it; corners round the edges.
- Open the aspect-ratio menu to choose Original, Wide (16:9), Vertical (9:16), Square (1:1) or Portrait (4:5).
- Choose Crop to keep only part of the screen.
If you recorded with your camera on, the camera track lets you add a camera-only moment: click the track where it says Click to add camera-only moment. The track is unavailable when the recording has no camera.
Add captions
Under Captions, choose Generate captions. Notch listens to the recording, writes the caption lines and lets you correct them. Turn on Burn in captions to place them in the exported video.
Export your video
- Choose Export at the bottom right to open Export video.
- Pick a Quality (resolution), Frame rate and Bitrate. Options above your recording are greyed out, and plan-only options show a Plus label.
- Check the summary line, for example 1920 × 1080 · 30 fps, and the Estimated file size.
- Choose Export video, then name the file and choose where to save it.
- Keep Notch open while it renders. When you see Export complete, choose Show in Explorer on Windows or Show in Finder on Mac.
Choose the right quality
Notch keeps an export within the quality you recorded, because it cannot add detail that was never captured. The dialog notes the limit, for example “This recording supports up to 1080p at 30 fps.”
| Setting | Choices | When to choose it |
|---|---|---|
| Quality | 480p, 720p, 1080p | 1080p for presentations and product demos. 720p for quick shares and smaller files. 480p when size matters most. |
| Frame rate | 24, 25, 30, 60 fps | 30 fps suits talks and walkthroughs. 60 fps is smoother for fast scrolling or animation and makes bigger files. 24 and 25 fps give a more cinematic feel. |
| Bitrate | Smaller, Recommended, Higher | Recommended is the best balance. Smaller shrinks the file and softens fine text. Higher keeps more fine detail and creates a larger file. |
The Recommended tag moves to suit your computer, so you can usually accept it. Free-trial and plan limits decide the highest resolution and frame rate you can choose; see Account & billing. The file-size value is an estimate, and the finished size depends on what is on screen.
Choose recording quality before you record
Export is limited by the recording. To set the maximum detail for new recordings, open Settings and find Recording:
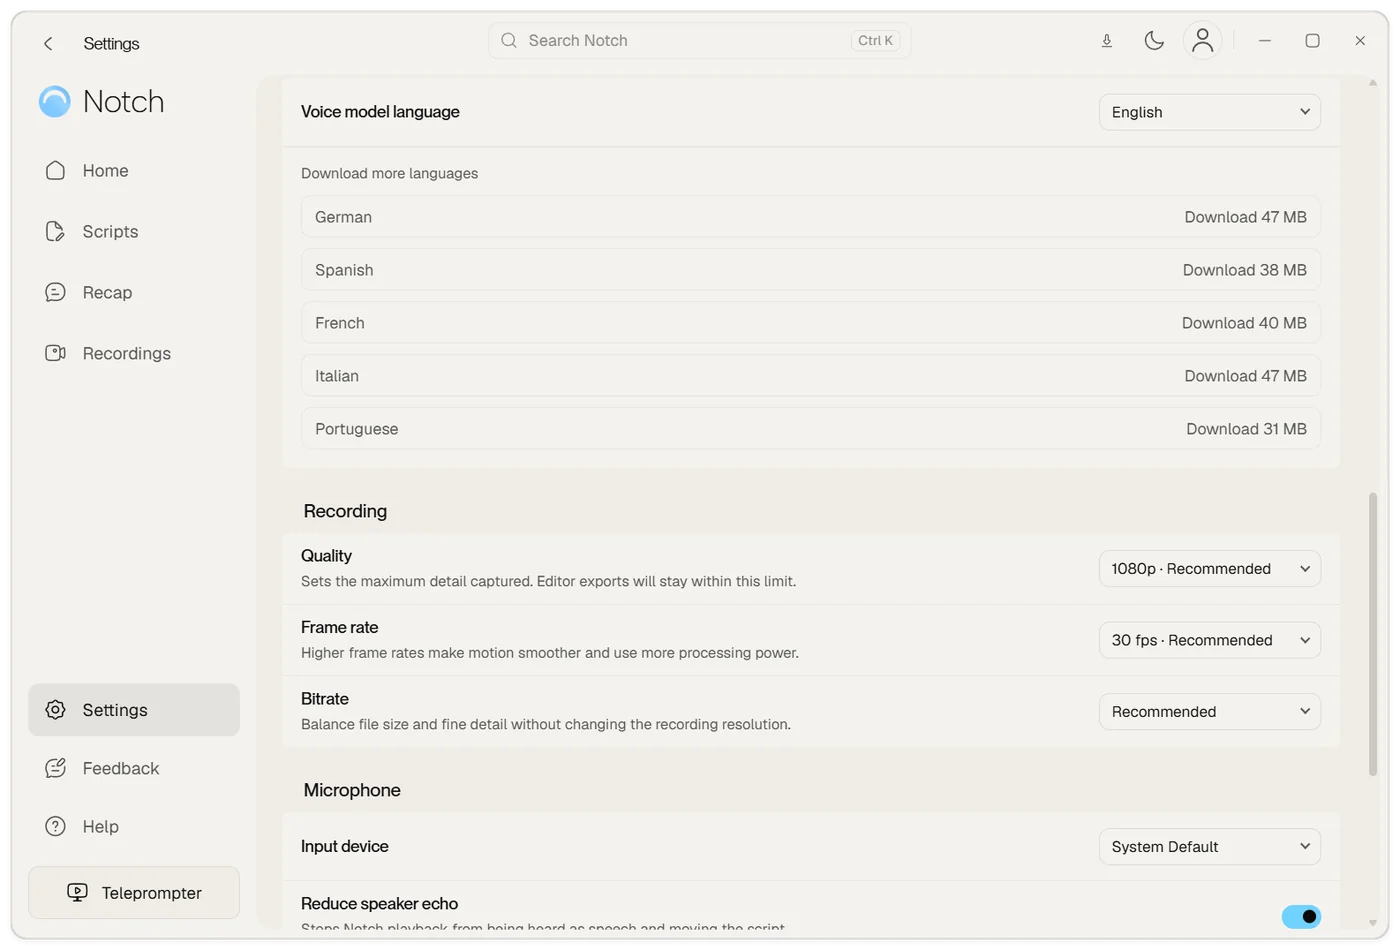
- Quality sets the maximum detail captured. Editor exports stay within this limit.
- Frame rate is smoother at higher values and needs more processing power.
- Bitrate balances file size and fine detail without changing the recording resolution.
If export does not finish
The export button or an option is greyed out
The recording itself is below that resolution or frame rate. Choose a lower option, or record again with higher settings in Settings → Recording.
Export is slow or stops
Keep Notch open and your computer awake until rendering finishes, and close demanding apps. Try 720p, 30 fps or the Smaller bitrate, which reduces the work.
I cannot save the file
Choose a different folder and check that the destination is writable and has free space. A 1080p, 60 fps export of a long recording can be large.
It failed again
Note the error message and the settings you chose, then contact support.